Learn How To Install Roof Rack Cross Bars On Any Car
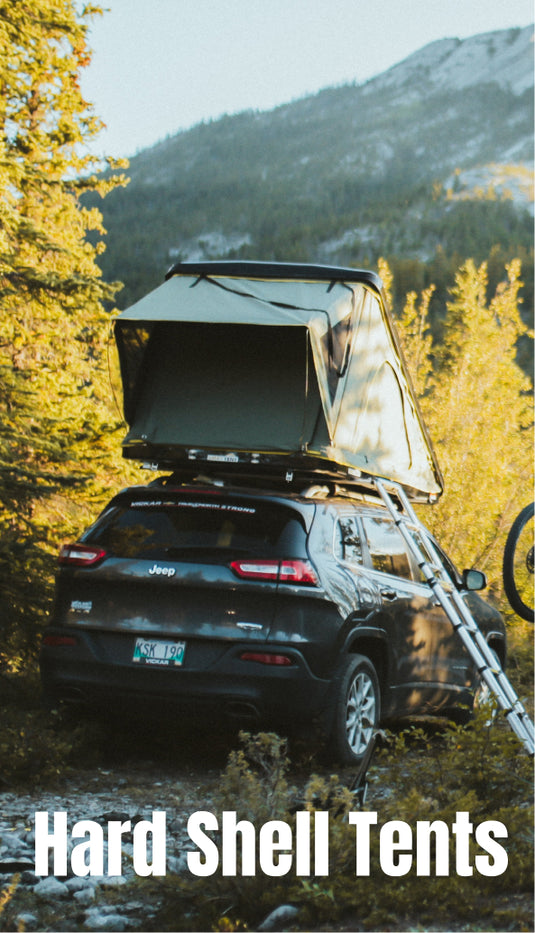
Roof rack systems provide the perfect solution for creating more storage space when you are heading out on the road. Not only do these systems allow for more space, but they make it simpler to transport items that won't fit in your trunk or on your back seat. These modern racks don't just leave it there though, roof racks today are modular. This allows you to customize the layout to accommodate elements such as sunroofs. It also allows for the attachment of items like rooftop tents.
While a correctly fitted roof rack system will provide you with many pain-free travels, an incorrectly installed roof rack could spell disaster. A roof rack over or under-torqued, poorly attached, overloaded, or even the incorrect fit for your vehicle will lead to car damage. Depending on the type of installation needed to attach your roof racks to your vehicle, there are other problems you may encounter. These come up when it comes to drilling into your car to allow for attachment. The holes you need to prepare must be carefully measured and well sealed. If not sealed, your roof may begin to rust, and should it rain, you will experience water damage. This makes it crucial to know how to install your roof racks correctly, come with us as we show you how!
Roof Racks for Different Vehicles

When we talk about roof racks, we refer to the entire system that comprises crossbars, side rails or towers, and fit kits. You can use different roof rack systems to transport various loads. Specific racks are great for use with rooftop tents. Others, not ideal for this purpose, may be suitable for transporting canoes, kayaks, or even surfboards. Other roof rack systems are designed to carry beds. Yet, not every roof rack system is the same. The one you end up using depends not only on the intended purpose but on the vehicle you own.
Some vehicles, such as certain sedans or hatchbacks like the Toyota Yaris, have no rain gutters, rails, or factory-installed fix points. These cars are known as Bare Roof vehicles. Others, such as Toyota Land Cruisers, come with four, usually hidden, fix-points located on the car's roof under little covers or caps. SUVs or adventure vehicles such as the 2020 Subaru Outback or the Jeep Renegade come with factory-fit raised roof rails that run from the front of the car to the back. Depending on which of these your vehicle has, you can find the roof rack system that best fits your vehicle. Each of these roof rack systems will need a different installation method.
How to Install Roof Rack Cross Bars on Any Car

Different vehicles need unique forms of roof rack installation. Cars that require the use of towers will need a fitting kit specific to the particular make and model of the vehicle. Because each vehicle model's shape is unique, and for the clamp to fit neatly and securely, it needs to be shaped to fit the door. Some need far more intensive attachment methods, such as those cars that have no rails, gutters, or fixed points. Drilling into the body of your vehicle may take a little more time, but it sure does provide a sturdy fit. Let's take a closer look at the various roof rack installation methods:
Bare Roof Vehicles
As mentioned before, bare roof vehicles need a fitting kit, towers, and crossbars. The fitting kit sees clamps designed to fit the door jamb of your car. These clamps are molded to fit the unique shape of the model of the vehicle you drive. Let us get into the nitty-gritty of how to install them:
- First, you will need to remove all objects from the top of your roof and give it a good clean.
- If the crossbars do not come pre-attached to the towers or feet, connect them together.
- Next, position the racks onto the roof of your vehicle.
- Once you are happy with the bars' placement, it is time to join the clamps to the towers.
- Place the clamp between the window trim or door jamb and the tower feet so that it rests in place.
- Secure the clamp to the tower feet with the bolt provided.
- Ensure that the rack is then secure and stable and does not move about when you shake it.
- Repeat this process for both sides of each crossbar.
Simple, efficient, and easy to attach and remove from your car. While some may question this set-up's sturdiness, it has been proven that this system is both durable and safe.
You can also install a roof rack to a bare roof vehicle with a little drilling...
This roof rack set will come with a template or set of measurements for the roof of your car or truck. This template indicates where you are to drill to allow the roof rack to be bolted down. Most often, the holes you will need to prepare will be placed in the area that the weather stripping is usually located.
- Locate the weather stripping and remove it. If necessary, clean the area.
- Take the rack, or rather the side rails, and place them where you would like to have the rack sit. (This is only necessary if you do not have an accompanying template. If you have a template, use that instead.)
- Once you are happy with the placement, mark off with a marker or pencil where the drill holes will need to go. We suggest measuring each side to ensure you have the rails matched up. Remember, these markings will be made in the weather duct. You must locate them in the exact center of the two sides of the duct.
- Now it is time to drill your holes. Ensure you have noted the correct depth to drill down to. (you don't want to damage any internal elements of your vehicle) Record as well the width the hole needs to be. Take note that you are drilling into metal. As such, your drill bit may need a little time to cool down after you make each hole.
- Once you have finished drilling, it is imperative to vacuum up any metal filings.
- Next, using a Q-Tip, seal the edges of the hole with a silicone-based sealant.
- Place the rivnuts into the holes.
- You will then most likely need to place a patch over this for added moisture protection.
- Next, thread the screw with the required washers. Place your side rails, and, using the screws, mount them in place.
- Tighten the screws and ensure the side rails are fixed.
Now you can attach the crossbars or support bars as you need them. All this requires is for you to bolt them in place. Many of these are modular and allow you to add as many as up to nine crossbars.
This installation requires careful measurement and placement of your roof rack. We always advise that you use a silicone adhesive to seal up the drill holes to prevent any water damage to your car. As you may imagine, this roof rack system is permanent. While the installation may seem tricky, you can rest assured that these racks are not only sturdy, but they are durable and offer a fantastic solution for adding extra storage space to trucks. Just take a look at the Prinsu Toyota Tundra Cab Rack (CrewMax) | 2007-2021 if you don't believe us!
Fixed Point Vehicles
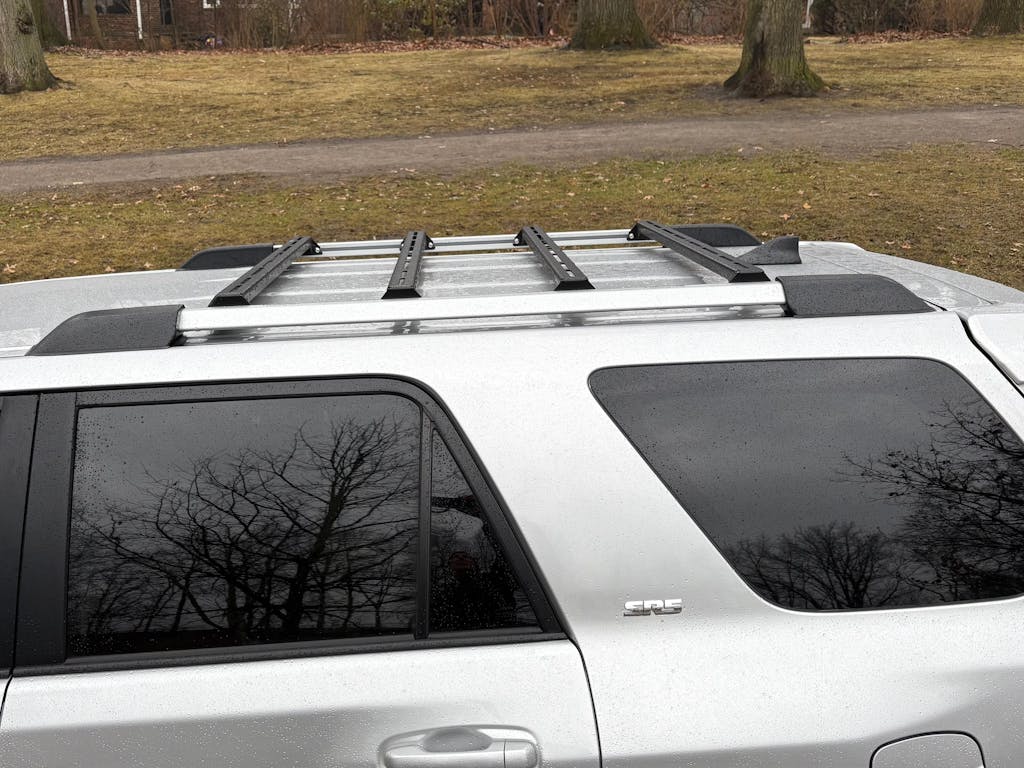
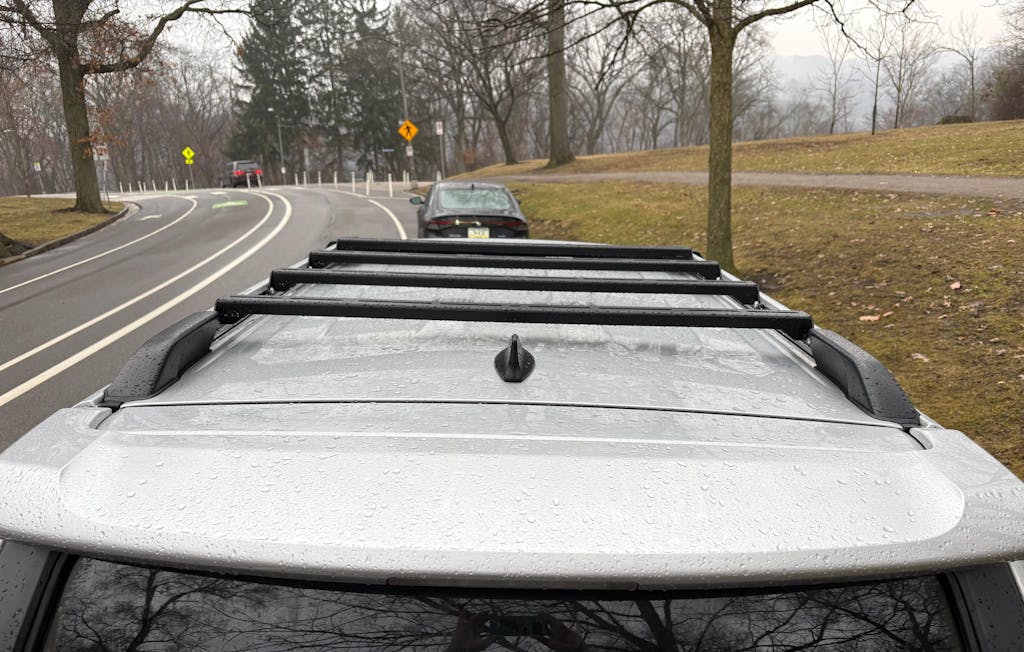
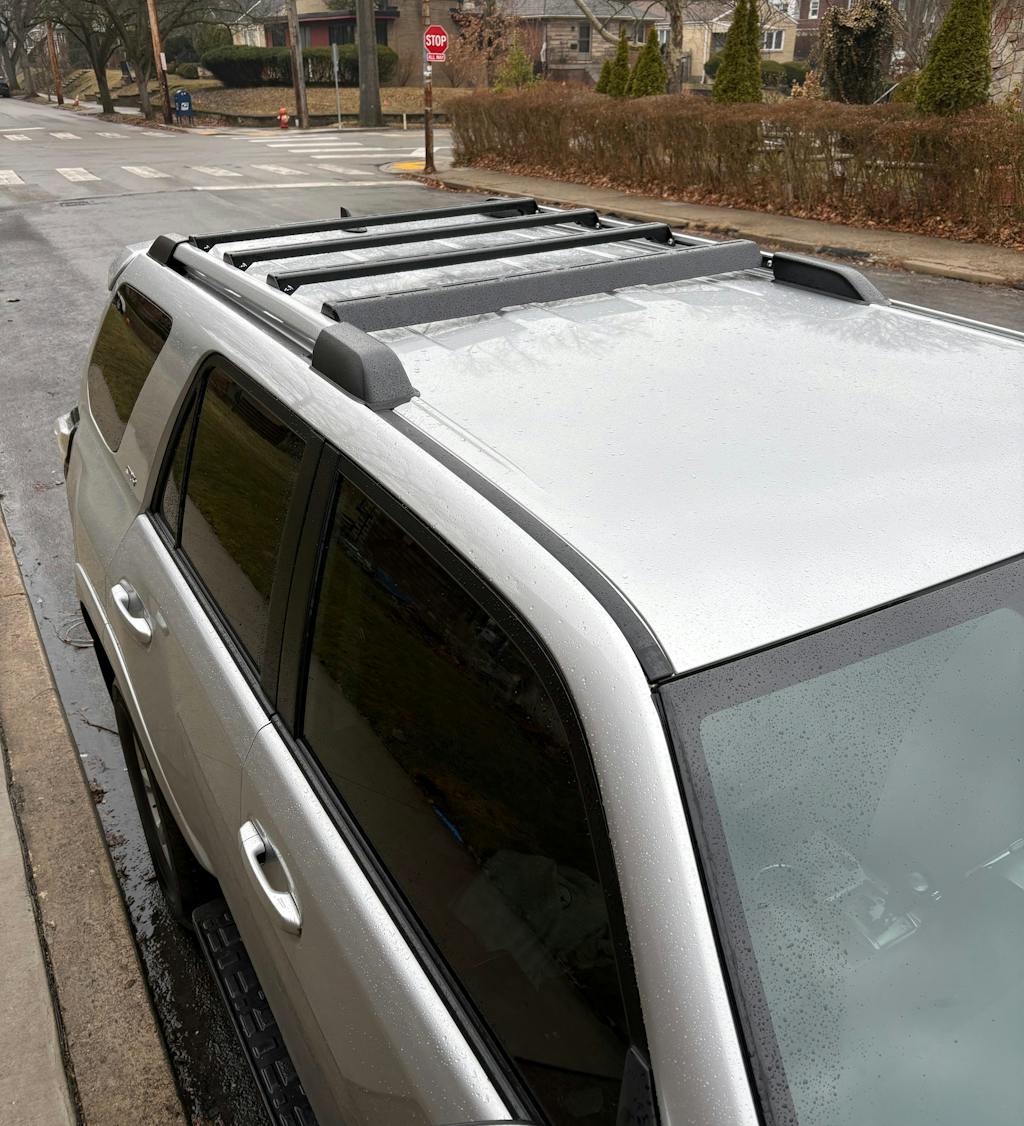
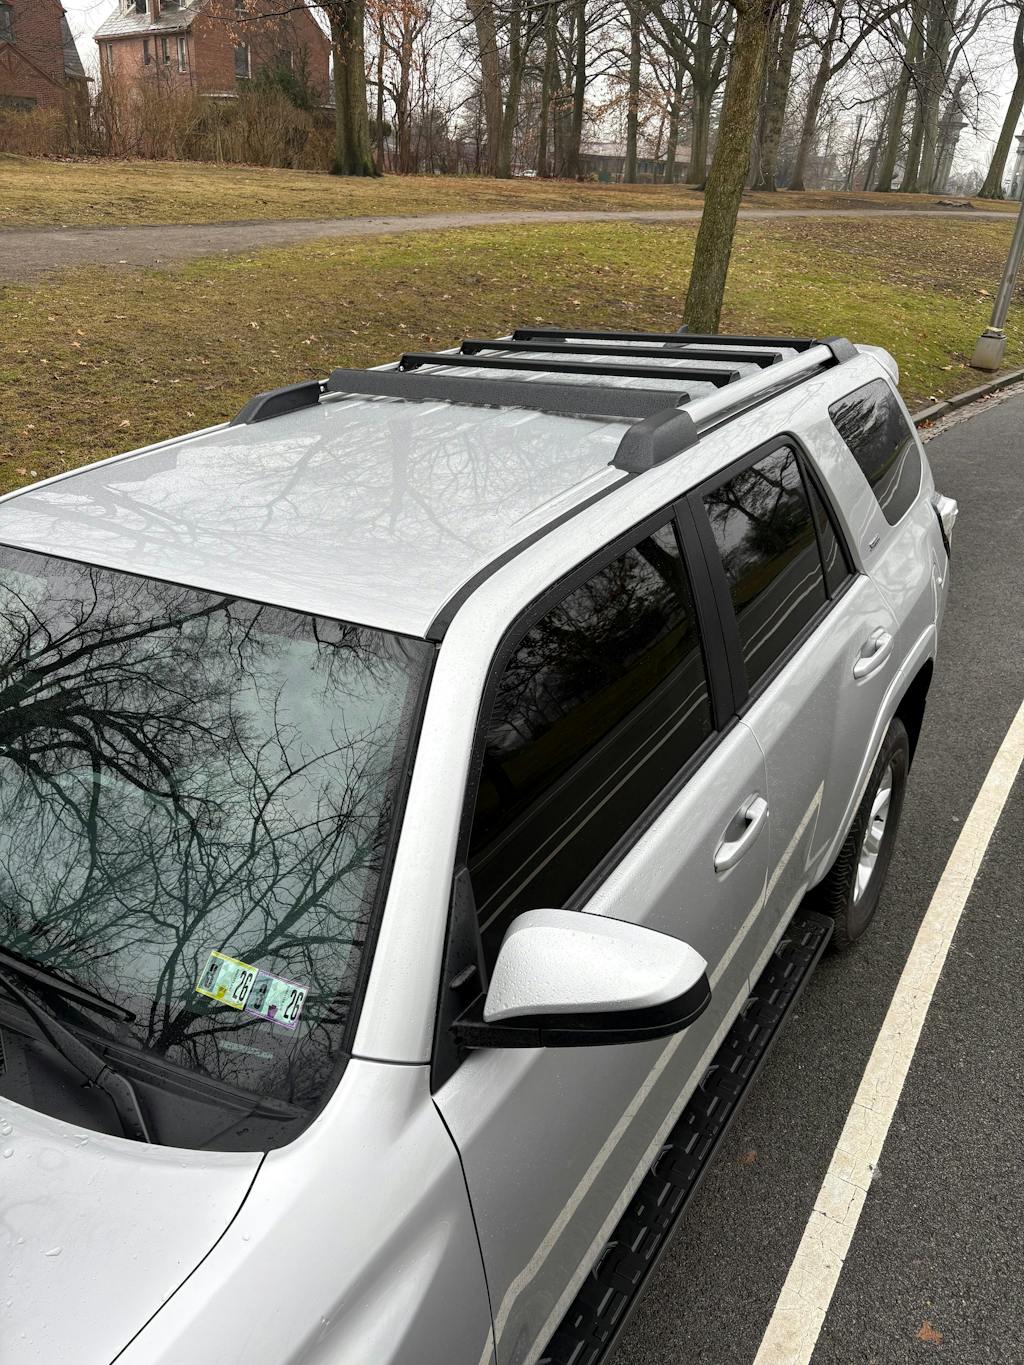
The roof racks designed for fixed-point vehicles are simple to install. These roof racks will need to be pre-assembled before being attached to your car at the four pre-made points. A 4Runner roof rack, for example, bolts together in a matter of minutes. The laser-cut side rails offer space for up to nine crossbars. These can be added or removed to custom suit your needs. The side rails feature built-in mounting tabs. The tabs are then bolted to the four factory mounting holes on your vehicle - no drills, no fuss! Here is how to attach them:
- Locate the four covered mounting points. These are usually located under covers or beneath the weather guards on the roof of your vehicle.
- Once located, remove the cover and give the mounting points a quick clean.
- If you have weather guard trim, make corresponding markings where the mounting points sit. Now you can cut the trim to fit back while accommodating the roof rack. Once you have resized the trim, place it back in the weather ducts.
- Now, cover the exposed holes with silicone and place the spacers included in your kit over the holes. Press the spacers down so that a fair amount of silicone express from the sides of the spacers.
- You can now line up the roof rack over the spacers, slot it into place, and then tighten it up.
- Test to see that the rack is firmly in place.
Rain Gutters
Some roof rack systems are designed to work with vehicles that feature rain gutters. One such system would be the Jeep Wrangler roof rack. How these roof racks are installed is through the use of clamps. The roof rack is assembled and will feature legs that suspend down from the frame. These legs feature a design that slots into the groove of the rain gutter. The rack is then walked over the roof with the legs sliding into place in the rain gutter. Once your roof rack is in its desired location, the legs are clamped to the rain gutter to keep the frame in place. Here is how it's done:
- First, if it is not already done or pre-assembled, you will want to build your rack.
- Now, find the feet from your kit and slide them into the rain gutter to see that height your rack will sit at is optimal.
- Returning to your rack now, slot the bolts into place on the side rail. These bolts are used to attach the legs to the roof rack.
- Before you bolt the legs into place, measure the distance across your roof. This ensures the legs are accurately spaced on the rack.
- Once you are sure the legs are correctly placed, bolt the legs in place and tighten to ensure they are connected.
- Now, this is where an extra set of hands will come in handy. Lift the rack and walk it over the roof of your vehicle, sliding the legs into the rain gutter as you go.
- Once the rack is positioned and you are happy with the placement, adjust the legs to the desired angle. This creates the right amount of tension, and firmly tighten the bolts that connect them to the rack.
- A clamp is then placed over the legs. It attaches from the outside of the rain gutter to the body of the legs to keep them in place in the channel.
- Tighten the clamps and check to see that the rook rack is firm and sturdy.
Fitted Raised Rails
Factory fitted raised roof rails allow for the simplest form of roof rack installation; they themselves are one step away from being a roof rack. A roof rack system designed to work with vehicles that have these rails, such as the Rack Mount Roof Rack Kit by Eezi-Awn, allows you to attach the rack platform to the accompanying feet. The feet are then clamped directly to the raised rails. It is as easy as pie:
- Assemble your crossbars by connecting them to the provided clamps.
- Once assembled, clip the clamps onto the raised rails of your vehicle.
- Position the crossbars as required.
- Measure on both sides to ensure they are straight and equidistant.
- Once you are happy with the placement, bolt the clamps in place.
- Double-check to see that the crossbars are firmly secured
How Long Does It Take to Install Roof Racks?

The amount of time to install roof racks onto your vehicle depends on the roof rack's style and the type of car you have. Installation that requires a certain amount of measuring and drilling will naturally take longer than a rack system that clamps to pre-fitted roof rails. The level of your skills and familiarity with this kind of task will also play a large part in how long it takes you to get the rack installed. Giving you a ballpark figure, we would say that a simple installation could take just 30 minutes. A more intricate attachment method could take anywhere up to four hours.
While installing roof racks may seem daunting, you will see how simple it can be once you get to the crux of it. Ensuring you have the right roof rack for your vehicle, following the instructions, and having a helping hand will make light work of the installation. So now that you know how simple it is to install a roof rack, browse through the Overlanding roof racks we have available, find the one that best suits your car, and then breeze through the installation like a pro.